Publish a movie to ShowServer with BPMediaNode
For install and standalone desktop routing (Windows / macOS), see the BPMediaNode docs.
This page is the optional ShowServer path: use BPMediaNode when you need a local movie or I/O device as a ShowServer source for Unreal. Unreal connects directly to ShowServer; MediaNode supplies the test content in this example. You can replace this source with any compatible ShowServer RTC feed.
The screenshots below are actual BPMediaNode Desktop UI captures. They use an isolated local ShowServer; substitute your venue’s address and credentials. Big Buck Bunny — © 2008 Blender Foundation / www.bigbuckbunny.org, CC BY 3.0. Movie frames are scaled in the live previews. See download and credits.
1. Connect to your ShowServer
- Install and open BPMediaNode Desktop, with its engine and FFmpeg available.
- Choose Connect to ShowServer over LAN.
- Enter your ShowServer URL, normally
http://SHOWSERVER:7474, and your sign-in details. Use the server’s reachable hostname or address;localhostworks only when ShowServer runs on the same machine. - Connect and verify the connected status before creating the output.
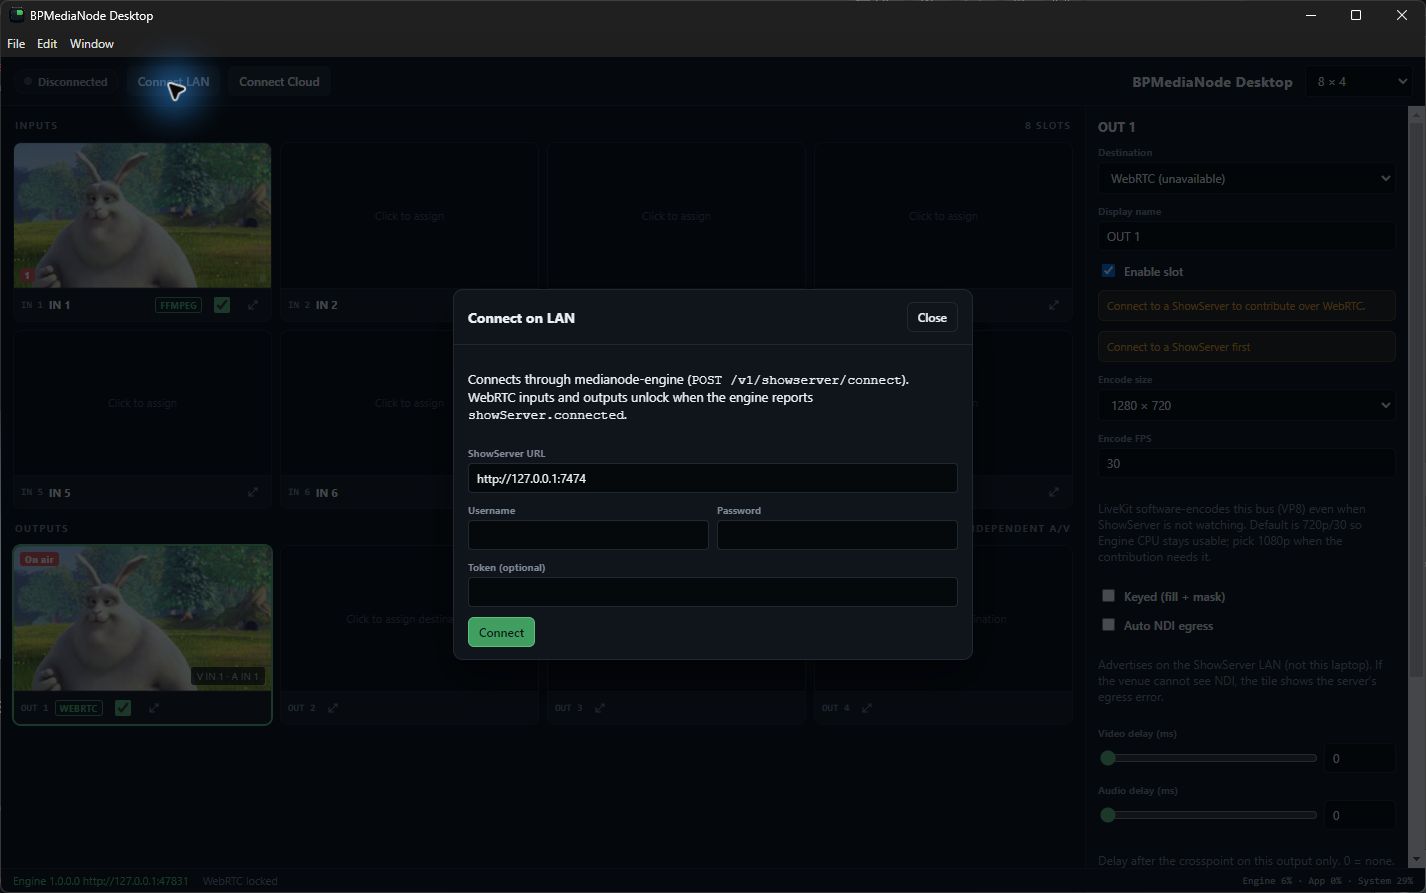
These captures demonstrate LAN operation. If you already operate a Cloud-capable ShowServer, use that deployment’s URL the same way.
2. Add the movie input
- Download and extract the sample movie, or choose your own local video file.
- Select IN 1 in the routing grid.
- In its inspector, choose FFmpeg as the input kind.
- Enter the complete movie path in URL, then click outside the field to apply it.
- Enable the slot. Enabling it starts the input; there is no additional Start step in this workflow.
- Confirm the thumbnail advances at normal speed. File playback is finite; restarting the input starts the movie again.
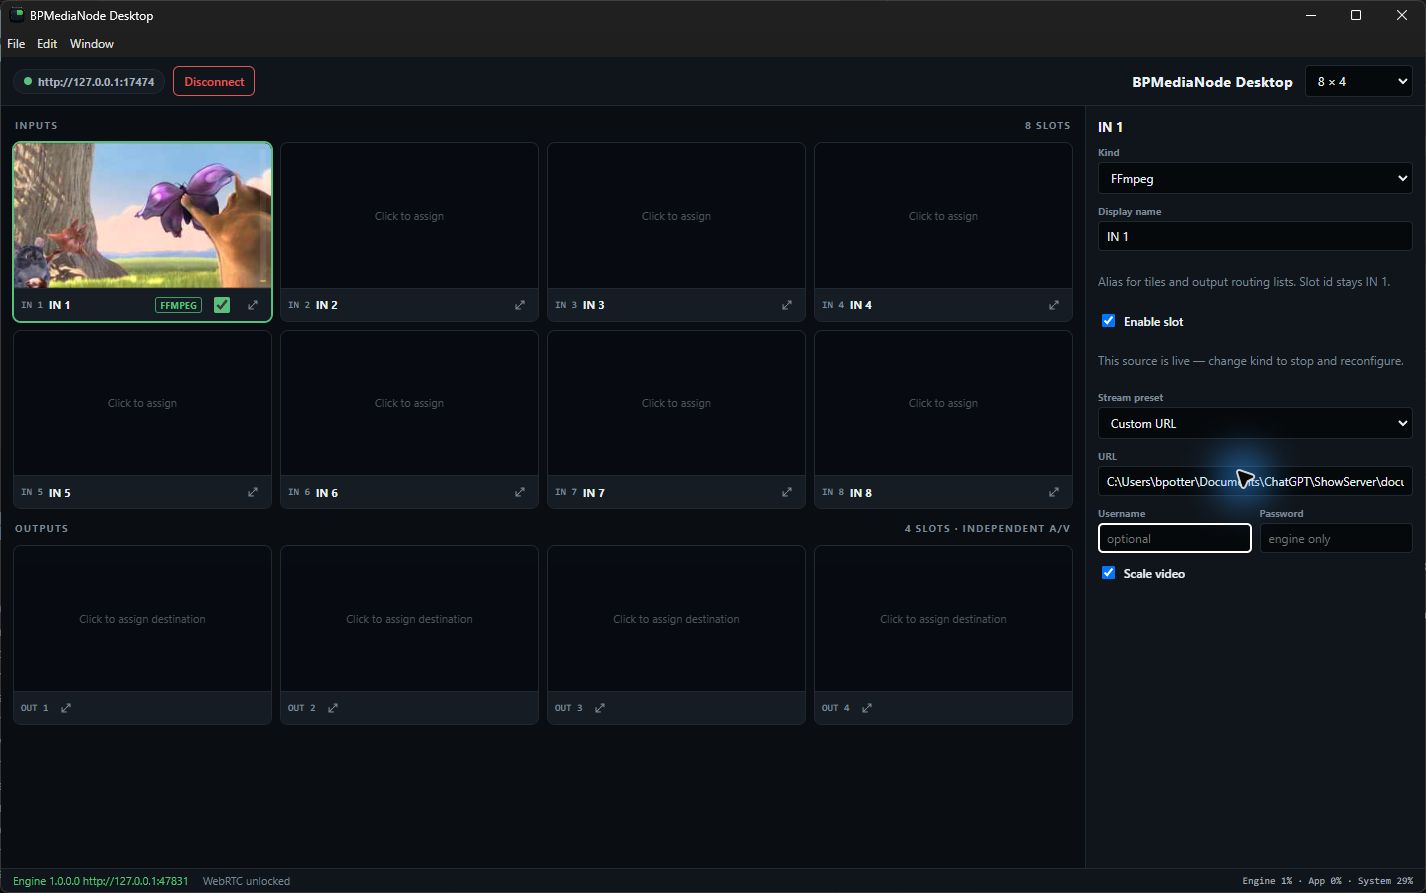
Use a BPMediaNode build containing the FFmpeg file-pacing fix. File inputs now use FFmpeg’s -re option so decoding follows the movie timeline instead of disk speed. Live network inputs retain their own timing. Unreal’s outgoing frame-rate setting cannot correct an upstream movie that is racing ahead. FFmpeg input-rate documentation.
3. Publish the input over WebRTC
- Select OUT 1.
- Choose WebRTC as its output kind.
- Start with 1280 × 720, 30 fps, and leave keyed/alpha output and automatic NDI output disabled.
- Enable the output slot.
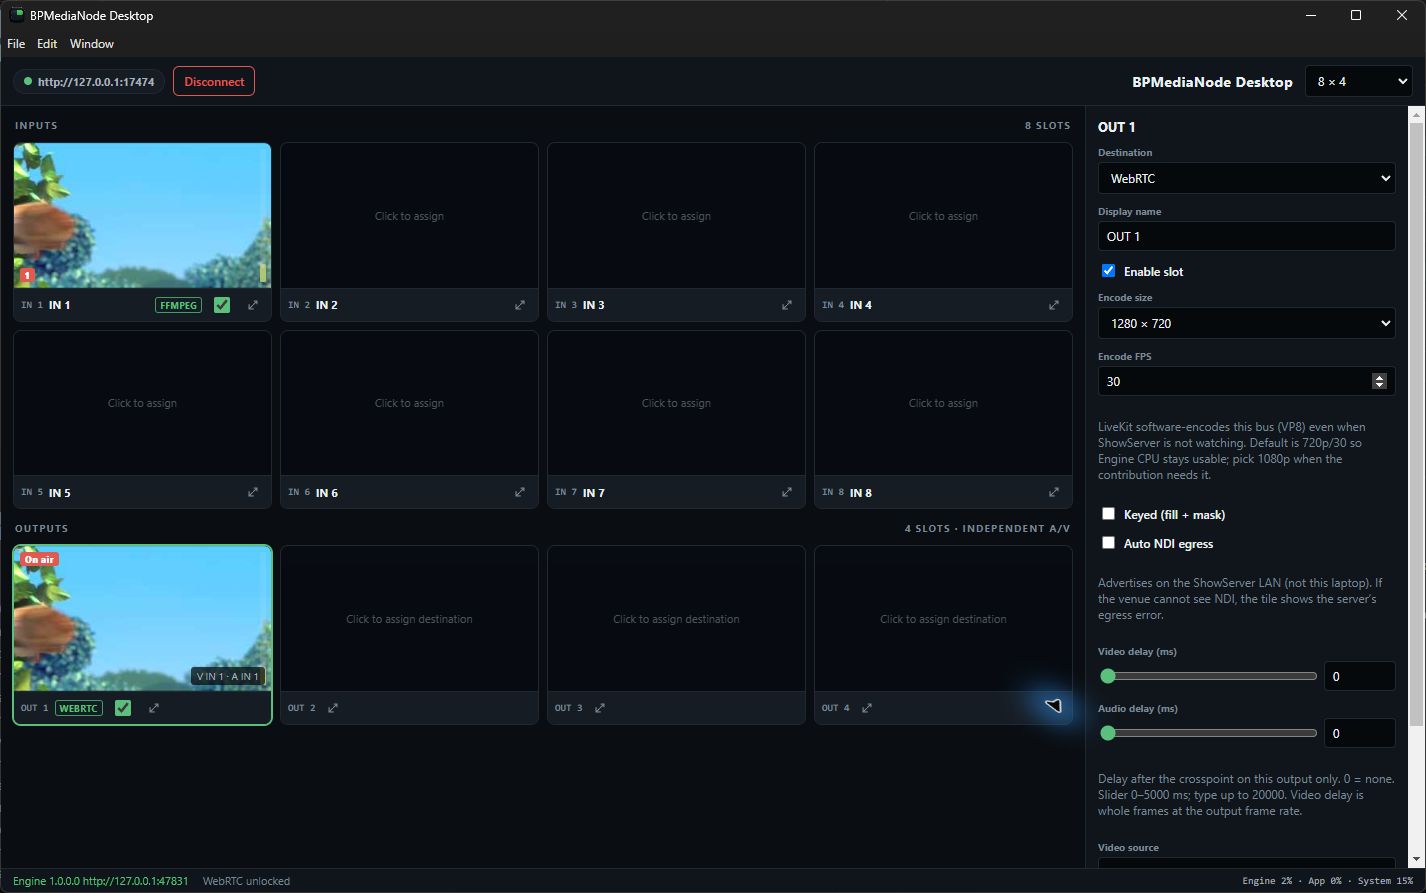
- Route IN 1 to the output’s video selection.
- Route IN 1 to its audio selection as well. These are independent routes; selecting a video source alone does not select its audio.
- Confirm that OUT 1 shows the movie, and check its audio meter during an audible passage.
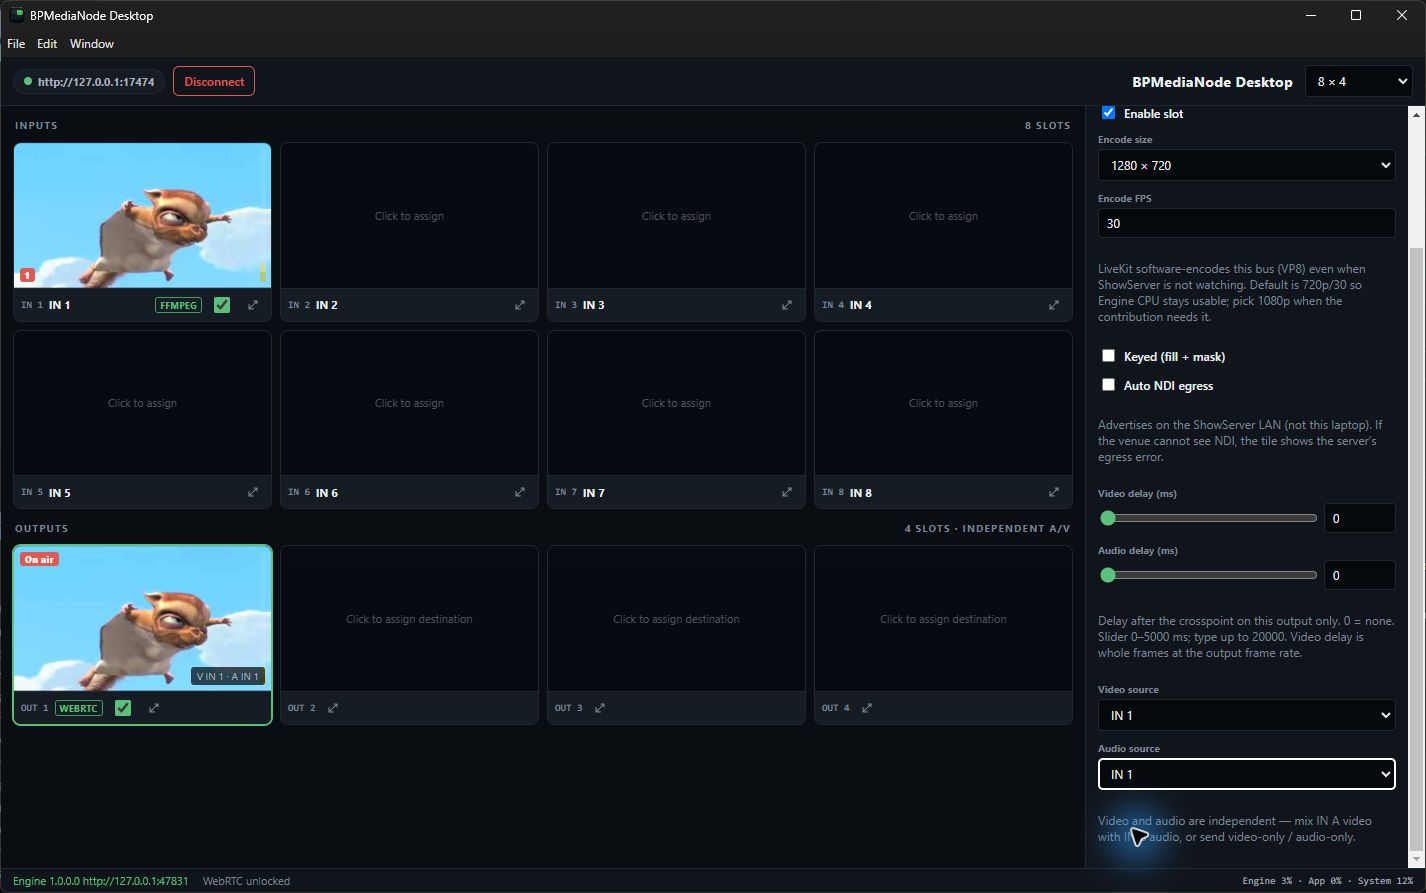
The output’s display name appears in ShowServer’s source list (OUT 1 in this example). Obtain that source’s ID, assign it to the Unreal RTC component’s Source Id, and connect. Continue at Put incoming ShowServer video on a surface.
The sample movie contains stereo audio, but the current MediaNode FFmpeg ingest path converts it to mono before RTC transport. Do not use this example to certify stereo-channel separation.
4. Check the rendered return
In ShowServer, open Live Media → WebRTC Tracks and select the preview for the Unreal component’s Display Name, for example Unreal Studio Return. You should see the rendered scene containing the movie screen, rather than just the original movie. This validates the second direction without requiring another MediaNode hop.
To receive the rendered return in BPMediaNode Desktop as well:
- Keep Unreal playing and connected.
- Select an unused input, such as IN 2.
- Choose WebRTC in Kind, and keep Enable slot checked.
- Open ShowServer source and select your Unreal publisher. The example is Unreal CineCamera Return · live · both.
- Confirm that IN 2 shows the rendered studio, including the virtual movie screen. Move something in Unreal and check that this preview changes.
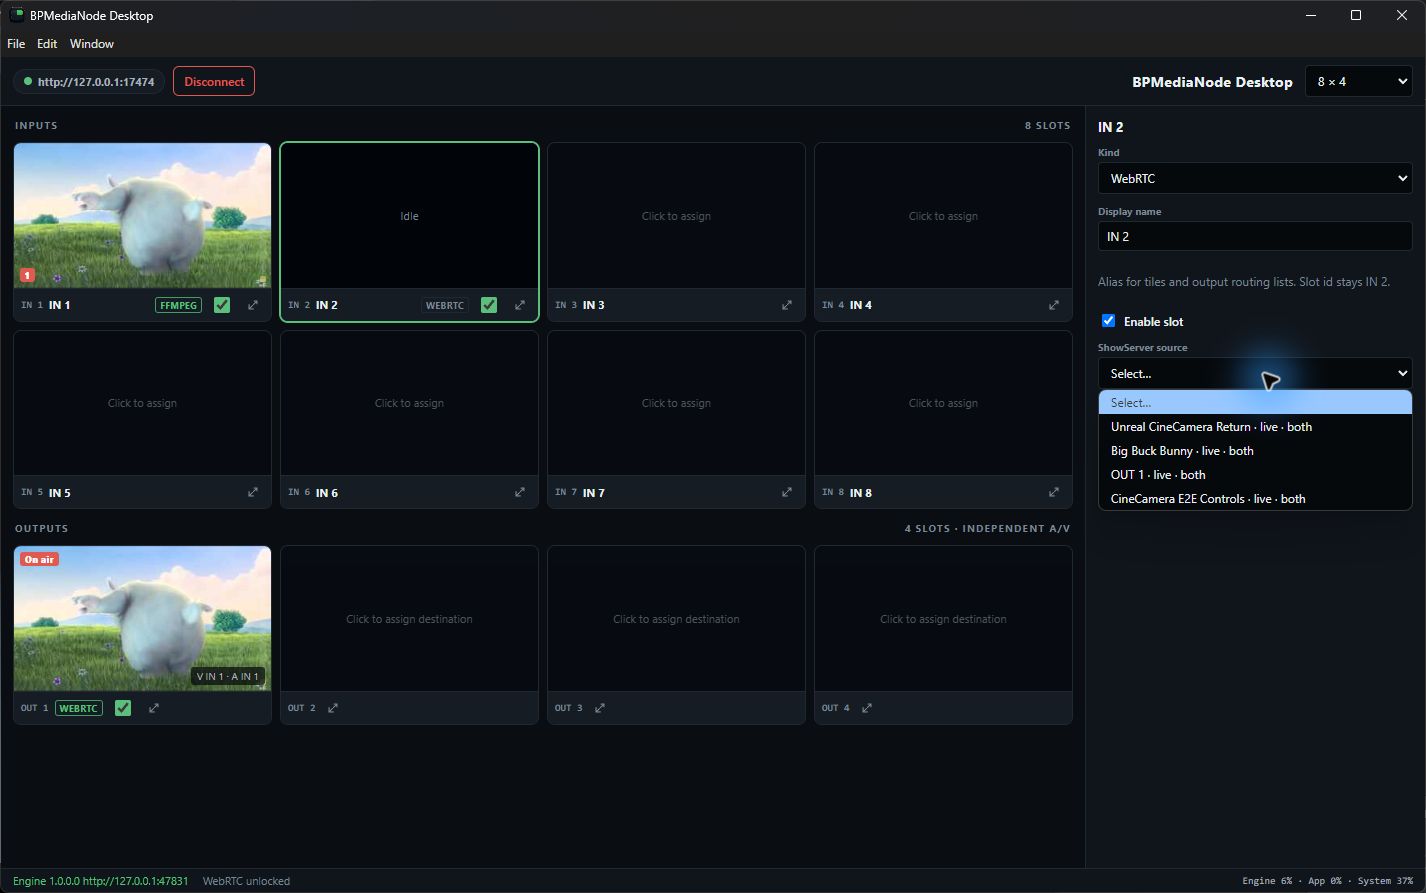
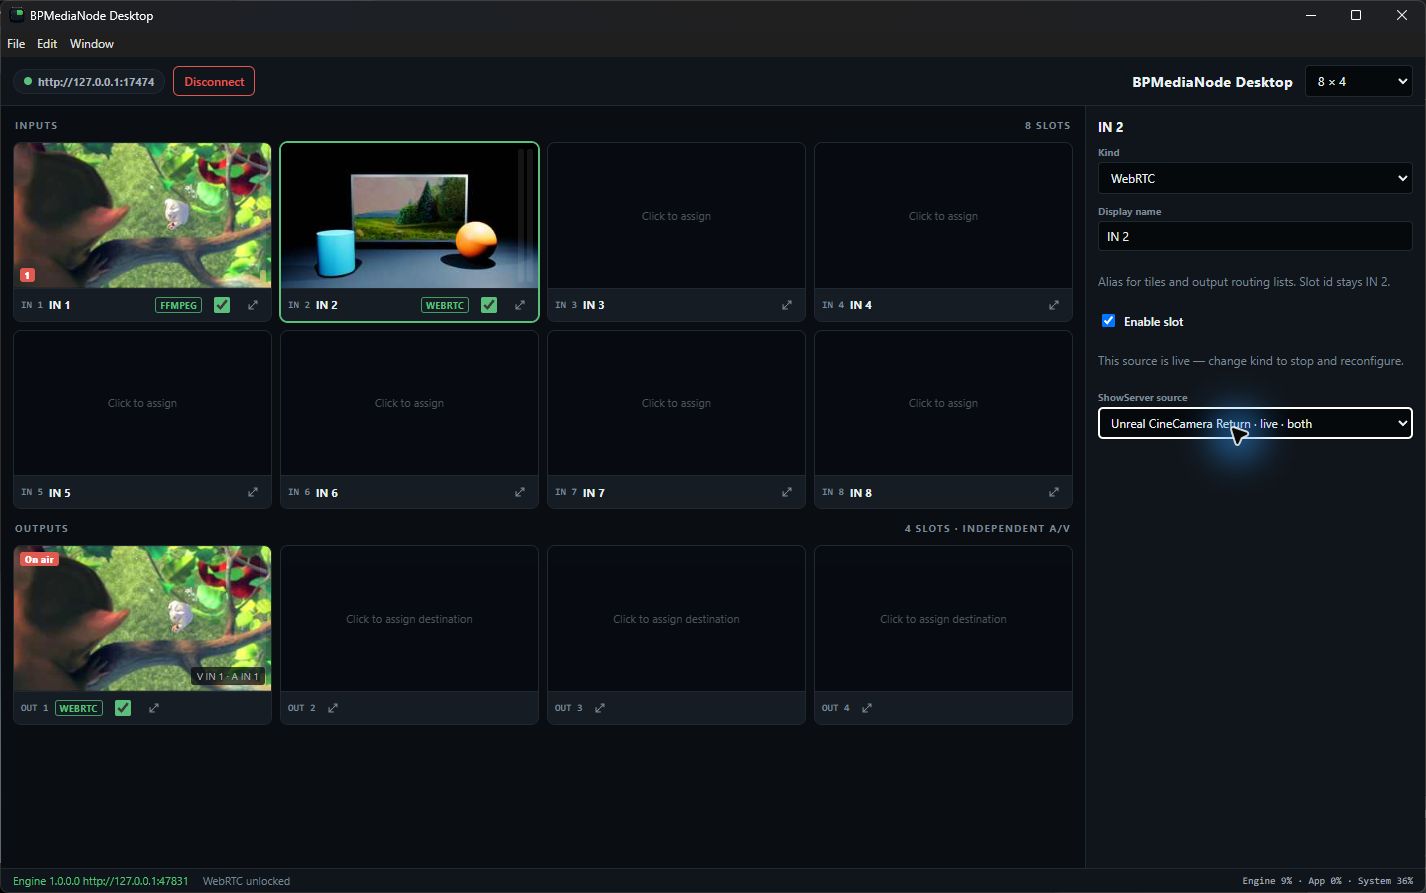
The original-movie preview and the movie inside the rendered return are from separate test inputs started at different times; their pictures are not a latency comparison. WebRTC input selection and video reception were exercised through the actual Desktop UI. This screenshot does not certify the audio meter or venue NDI output.
Keep the Unreal subscription pointed at the original movie source, not its own return. For an audio loop test, mute physical monitoring to avoid feedback.
Use a build with the WebRtcAudioNormalizer fix for live audio route changes. It keeps the RTC track at 48 kHz stereo when switching between mono/stereo or supported sample rates. Older builds require disabling and re-enabling the output after a format change. A MediaNode monitoring meter can retain its last value; verify current playback or a fresh recording as well.
For a headless renderer, the companion explicitly requests the program video layer. If a movie still arrives below its configured frame rate, measure the source separately from the Unreal render rate; a steady outgoing studio frame rate can contain a slow or stale input screen. See the measured local results.
Use a build containing the publisher-recovery fix as well. A failed or stalled audio capture now marks the publisher unhealthy so MediaNode automatically recreates it using the same source identity. The same health policy covers failed video pumps. Recovery was verified with real ShowServer/LiveKit and decoded PCM; a routing meter alone still does not prove delivered audio. See recovery validation.