Optional sample: a video studio that talks to ShowServer
Run this on LAN ShowServer with optional BPMediaNode when you need a movie or device source. Already operate a Cloud-capable ShowServer? See Remote / Cloud studio after the LAN path works.
Send a video into Unreal, put it on a virtual screen, and send the rendered studio back to ShowServer. This sample uses BPMediaNode → ShowServer → Unreal → ShowServer. Your source and return are separate feeds, so you can see exactly which direction each picture is travelling.
For installation into an existing project, start with the project setup guide. This page is an optional developer/sample reference. The local video round trip and background tone-audio return have been demonstrated. Editor background mute was identified; see validation for the current audio checks and capture status for remaining screenshots.
Before you begin
- A Windows x64 computer with Unreal Engine 5.8 and a graphics device capable of running your scene.
- A built BPUnrealRTC plugin package, including its
Binariesfolder and Win64 runtime. - A running ShowServer and your ShowServer sign-in details.
- BPMediaNode Desktop with its engine running and FFmpeg available.
- Big Buck Bunny, or a video you have permission to use.
For the first run, put all three applications on the same computer or LAN. Use the ShowServer’s actual address wherever this guide shows http://SHOWSERVER:7474. The documentation test instance uses port 17474 to keep its sample data separate.
1. Open the included studio
- Extract the built plugin package to a folder you can write to.
- Open
Samples/Demo/BPUnrealRTCDemo.uprojectinside that package. - In the Content Browser, open BPUnrealRTCBidirectional.
- In the Outliner, find 01 - RTC Camera and Connection, 02 - Incoming ShowServer Video and Audio, and 03 - Player Preview Camera.
The first actor owns the outgoing scene capture and the RTC connection. The second displays incoming video and plays incoming audio. The third is an ordinary Unreal camera for viewing the scene when playing the level. The monitor remains blank until an incoming source is selected and connected.
For an existing Unreal project, copy BPUnrealRTC into its Plugins directory, enable BPUnrealRTC under Edit → Plugins, and restart. Use Unreal’s Migrate command on the sample map to bring the map and its materials into your project together.
2. Feed Big Buck Bunny into ShowServer
- Open BPMediaNode Desktop and choose its LAN connection action.
- In Connect on LAN, enter your ShowServer URL, username and password, then connect. WebRTC inputs and outputs become available after the engine connects.
- Select an empty input slot. Choose the FFmpeg source type.
- Set its label to Big Buck Bunny. In URL, enter the complete local path to the downloaded movie, such as
C:\Media\BigBuckBunny_640x360.m4v. - Enable the input slot and check that its preview moves and its audio meter responds.
- Select an output slot and choose WebRTC. Set its display name to Big Buck Bunny.
- Route both the video and audio from the Bunny input to that output. Start with a modest encode size and frame rate; this demo normalizes the movie to 640 × 360 at 24 fps.
- Leave Keyed (fill + mask) off for this ordinary opaque movie. Leave Auto NDI egress off while checking the round trip.
- Open ShowServer’s media page at
/cluster/media. Confirm that Big Buck Bunny appears as a live source.

This is a captured frame from the running BPMediaNode input, not a mock preview. Film: © 2008 Blender Foundation / www.bigbuckbunny.org, CC BY 3.0.
The FFmpeg source reconnects at end of file; it is suitable for this demonstration but is not a frame-accurate seamless-loop player.
3. Connect the Unreal monitor
The included launcher can sign in and list the actual source IDs for you. Close other copies of this sample before launching another copy.
-
Open PowerShell in the built plugin package folder.
-
Run:
.\Scripts\OpenBidirectionalDemo.ps1 -ShowServerUrl http://SHOWSERVER:7474 -
Enter your ShowServer credentials when prompted, unless you already supplied
BPSHOW_TOKENin this PowerShell session. -
Choose Big Buck Bunny from the numbered list.
-
The launcher opens the sample and starts Play in Editor. The connection settings are applied in memory; credentials are not written into the map.
To configure it yourself, select 01 - RTC Camera and Connection, select its ShowServer RTC component, and expand ShowServer → Connection. Set Base Url, leave Cloud off, set Source Id to the source’s ID, keep Publish on, and enable Connect On Begin Play. Start the editor from an environment containing BPSHOW_TOKEN, or call the component’s Blueprint Connect function with credentials supplied by your own login flow. Press Play.
Use the source ID, not its friendly name. You can obtain IDs from the launcher’s list or authenticated GET /api/v1/webrtc/sources.
The screen actor’s Source Actor references the RTC camera actor. Its material, M_RTCVideo, has a texture parameter named RTCVideo connected to Emissive Color. The screen actor updates that parameter when the incoming texture changes, including after a resolution change.
4. Watch the Unreal return
- In ShowServer’s media page, select Unreal Studio Return.
- Check that it shows the studio geometry and the movie playing inside the virtual monitor.
- For a second receiver, add a WebRTC input in BPMediaNode and select Unreal Studio Return under ShowServer source.
- Keep Unreal subscribed to Big Buck Bunny. Selecting its own return would create a recursive video loop.
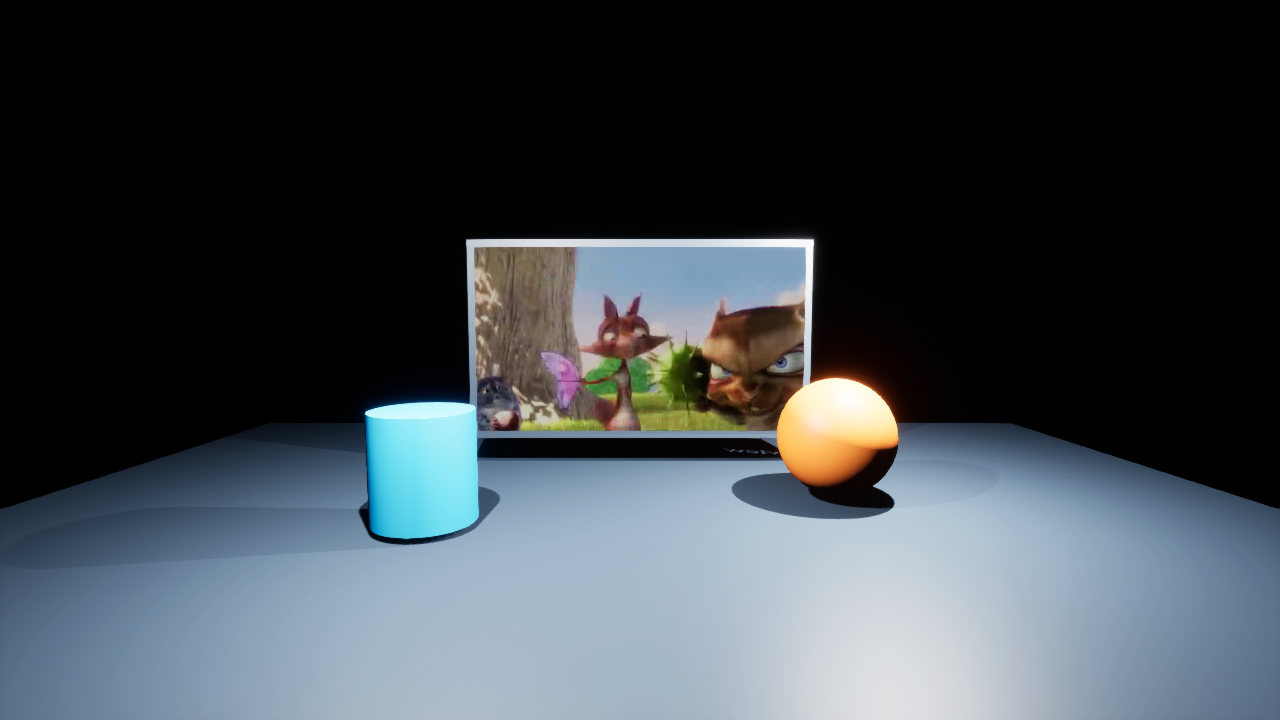
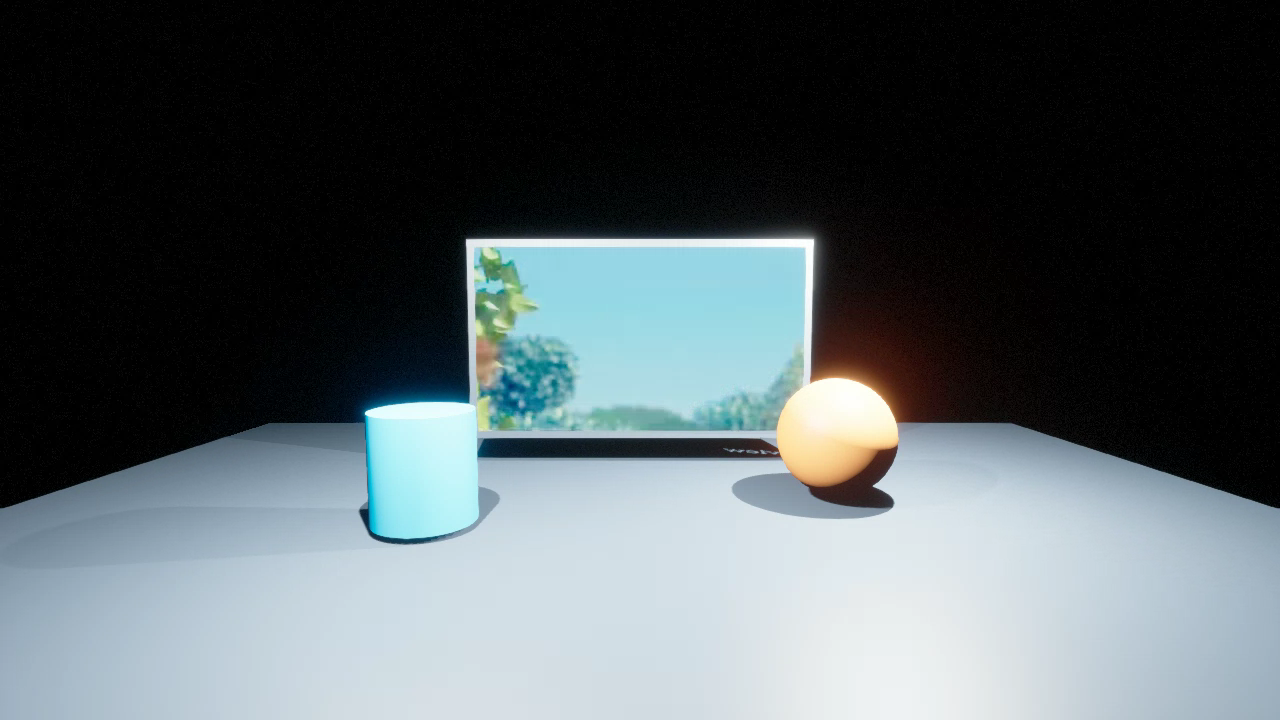
These are real captured media frames. They are not screenshots of the editor or media-routing controls. The two captures may show different movie frames because they were taken at different times.
5. Route audio deliberately
Editor setup: enable Allow Background Audio and disable Use Less CPU when in Background in Editor Preferences. A later active-RDP test verified nonzero received, mixer, captured-submix and downstream-return audio with these settings. See validation; audio/video synchronization and unattended device changes still require acceptance testing.
To run the included audio round-trip demonstration, add -ReturnAudio to the launcher command. It sends the incoming movie audio to the sample’s SM_RTCProgram submix and captures that submix for Unreal Studio Return. Without the flag, incoming audio plays in Unreal but is not automatically returned.
Into Unreal: the screen actor’s Play Received Audio property enables playback of the received 48 kHz stereo procedural audio stream. Disable it on duplicate monitors so the same audio does not play multiple times.
Out of Unreal: create a Sound Submix for the program audio you want to return. Route the chosen sounds to that submix and select it in the RTC component’s Capture Audio Submix property before connecting. Alternatively, call Capture Submix after Connect, passing that submix asset. A null submix is not valid for that function. The sample project sets its Windows mixer to 48 kHz; other sample rates are rejected by this capture path.
For a demonstration that returns the movie’s audio too, set Received Audio Submix to the same submix before connecting. Keep the return’s loudspeaker monitoring muted while evaluating routing to avoid an acoustic or digital feedback loop. Stop Submix Capture ends audio publication without disconnecting video. Received Audio Peak and Captured Audio Peak show the last PCM buffer peaks on each side of the Unreal mixer.
These routing properties are implemented in the runtime component and are available to packaged projects. Python is only used by the optional editor launcher, not by runtime RTC transport or audio capture.
6. Use your existing CineCamera
You do not have to use the sample’s camera actor. BPUnrealRTC accepts an 8-bit BGRA Texture Render Target 2D.
- Enable Unreal’s Cine Camera Scene Capture plugin and restart.
- Use a CineCamera actor or Blueprint with a CineCaptureComponent2D parented to its CineCameraComponent. This preserves the intended cine-camera relationship.
- Assign a render target to the cine capture. Match its dimensions to your output and use an 8-bit BGRA format supported by BPUnrealRTC.
- Add a BPUnrealRTC component to the actor that owns your routing.
- Assign the same render target to its Camera Output property.
- Connect that RTC component as above.
The current BPUnrealRTC component does not implement Unreal’s Media Output or Media Source asset interfaces. It therefore cannot yet be selected directly as a standard VCam Media Output provider, and its incoming texture is not a Media Texture. The capture and material workflow above is the implemented route. Cine capture is an additional rendering view; check your scene’s exposure, post-processing and GPU budget.
See Epic’s Cine Camera documentation for the built-in capture component.
7. Move to a remote Unreal host
After the LAN round trip works, follow Cloud and venue output. Keep the same source/return arrangement and change the connection to the Cloud pairing flow. Do not replace a local URL with an EC2 public IP and assume that implements ShowServer Cloud routing.
If something is blank
| Symptom | Check |
|---|---|
| No RTC connection | Win64 runtime executable exists in the plugin package; credentials are available to the editor process; the Base Url is reachable. |
| No Bunny picture | The BPMediaNode input and WebRTC output are started; the Source Id matches the live ShowServer source. |
| Incoming texture exists but screen is blank | Source Actor references the right RTC actor; material slot 0 uses M_RTCVideo; its parameter is RTCVideo. |
| Scene visible locally but no return | Publish is on; Camera Output points to the capture target; the target is 8-bit BGRA. |
| No sound | Check source meters, Play Received Audio, output device, and the explicit 48 kHz capture submix for the return. |
| Picture clears during an interruption | The plugin clears stale incoming video instead of leaving an old frame on screen. Wait for reconnection and check OnStatus. |
| AuthenticationRequired | Supply fresh credentials or a new Cloud pairing code and reconnect. Revoked authentication is not a network outage. |
Try a source interruption
- Keep Unreal running and stop the Bunny WebRTC output in BPMediaNode.
- Confirm the studio keeps rendering while its virtual monitor clears.
- Restart the same output and wait for the monitor to resume.
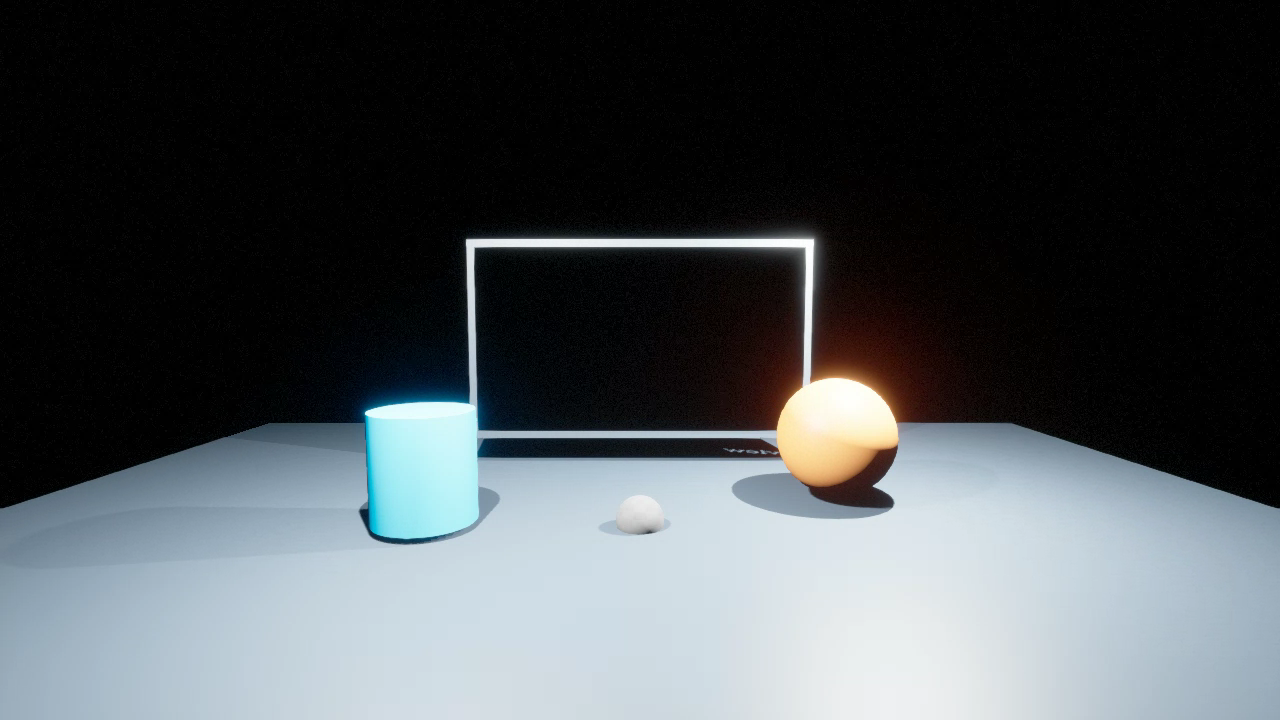
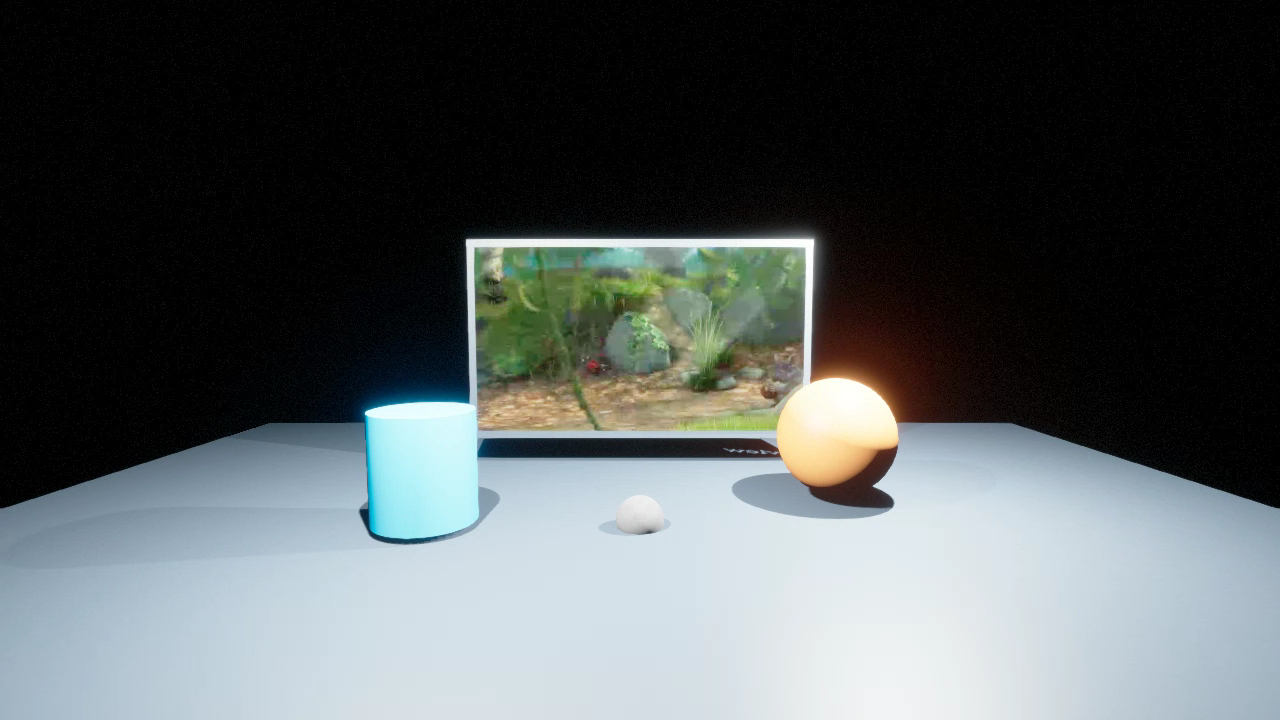
These are decoded return frames from the local recovery test. Film visible in the recovered frame: © 2008 Blender Foundation / www.bigbuckbunny.org, CC BY 3.0.